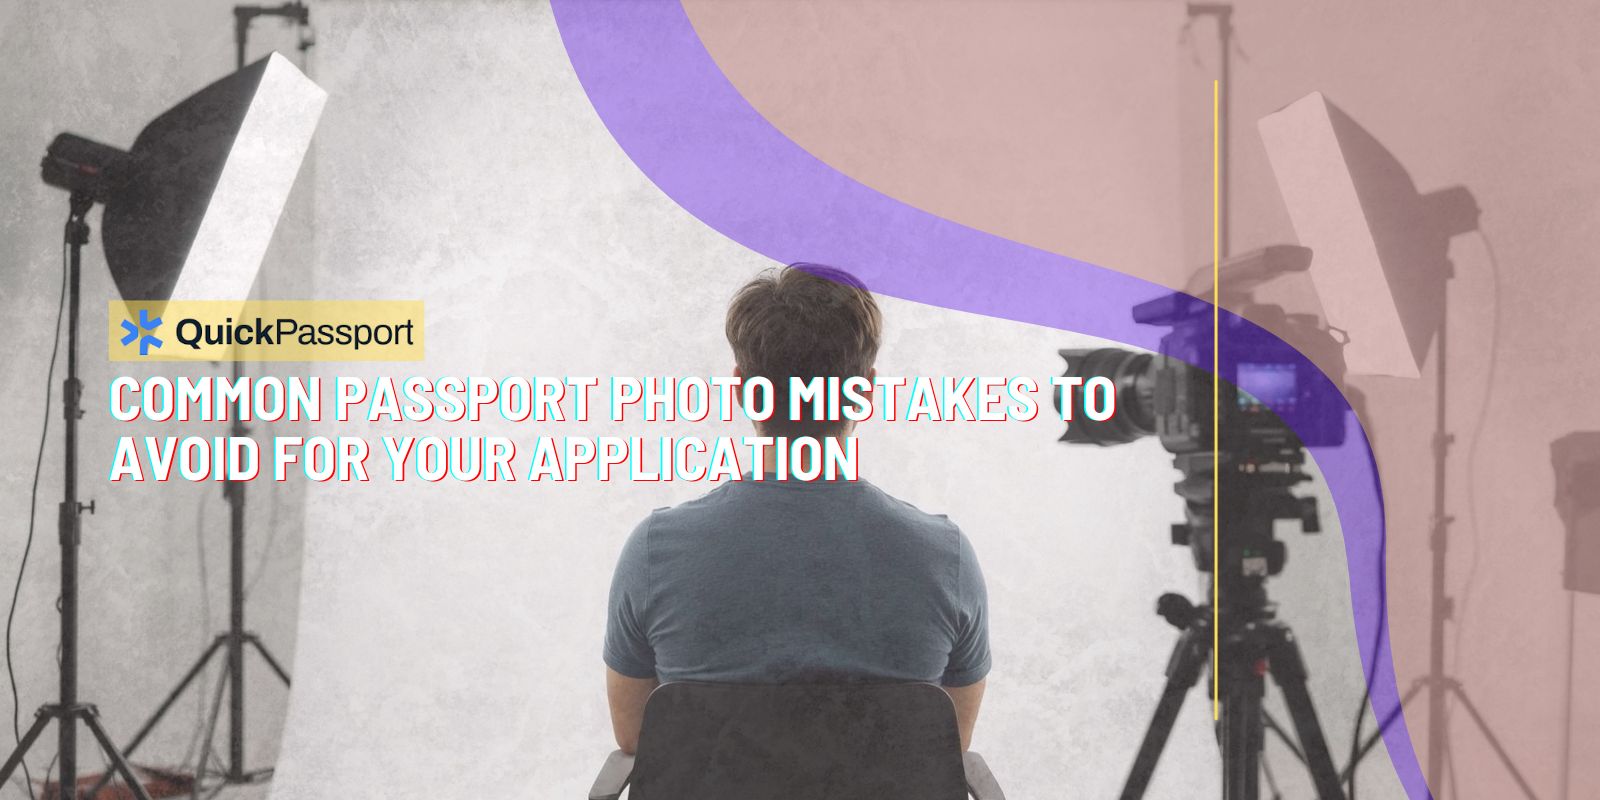
Getting your passport photo right the first time can save you significant time, money, and frustration during your application process. Unfortunately, many applicants make simple yet costly mistakes that result in rejected applications and delayed travel plans. Understanding the most common passport photo mistakes to avoid is crucial for ensuring your application moves smoothly through the approval process.
Passport photos must meet strict government specifications that cover everything from facial expression and head positioning to background color and lighting conditions. These requirements exist to ensure consistency across all passport documents and to facilitate security screening processes. Even minor deviations from these standards can result in your entire application being returned, forcing you to start the process over again.
The consequences of passport photo mistakes extend far beyond simple inconvenience. Rejected applications can delay your travel plans by weeks or even months, potentially causing you to miss important business meetings, family events, or vacation opportunities. Additionally, you’ll need to pay application fees again and invest more time in gathering required documentation.
Professional passport photo services like QuickPassport – Phoenix understand these requirements intimately and can help you avoid the pitfalls that trap many first-time applicants. However, whether you choose professional services or attempt to take your own photos, knowing what mistakes to watch for is essential for success.
This comprehensive guide will walk you through the most frequent passport photo errors, provide detailed passport photo tips for avoiding them, and explain the specific requirements that govern acceptable passport photographs. By understanding these common mistakes before you begin the photo process, you can ensure your application receives approval on the first submission.
Key Takeaways
- Background Requirements: Use only plain white or off-white backgrounds without shadows, patterns, or decorative elements that could interfere with facial recognition technology
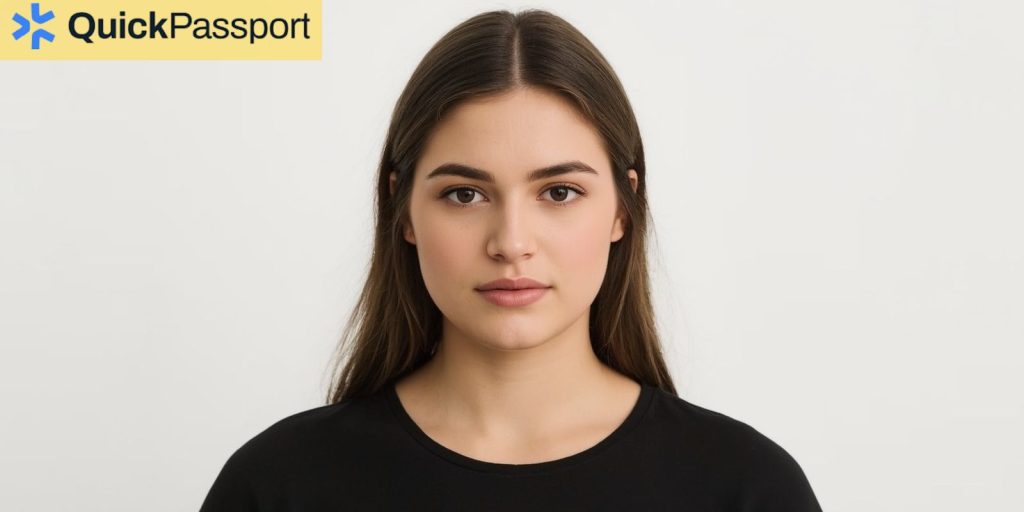
- Facial Expression Standards: Maintain a neutral expression with your mouth closed and eyes looking directly at the camera – no smiling, frowning, or unusual expressions
- Head Positioning Rules: Keep your head straight and centered in the frame with your face occupying 50-69% of the total image area from chin to top of head
- Lighting Specifications: Ensure even, natural lighting across your entire face without harsh shadows, glare, or red-eye effects that could obscure facial features
- Clothing Guidelines: Wear everyday clothing in colors that contrast with the white background, avoiding uniforms, white shirts, or clothing that blends with the backdrop
- Eyewear Restrictions: Remove glasses unless medically necessary, and if worn, ensure no glare, shadows, or frame obstruction of your eyes
- Head Covering Policies: Religious head coverings are permitted if they don’t obscure facial features, but fashion accessories, hats, and casual head coverings are prohibited
- Photo Quality Standards: Submit high-resolution images that are sharp, clear, and properly exposed without digital alterations, filters, or retouching
- Size and Dimension Requirements: Follow exact measurements of 2×2 inches with specific head size proportions and proper cropping boundaries
- Professional Service Benefits: Consider using experienced services like QuickPassport – Phoenix to ensure compliance with all current regulations and avoid costly resubmissions
Understanding Passport Photo Requirements Overview
The U.S. State Department maintains detailed specifications for passport photographs that serve multiple purposes in the application and security screening process. These requirements ensure that your photo can be properly integrated into your passport document and that facial recognition systems can accurately process your image for security purposes.
Passport photo standards cover technical aspects like image resolution, color balance, and file format, as well as compositional elements such as head positioning, facial expression, and background appearance. The specifications also address personal appearance factors including clothing choices, eyewear, and head coverings that might affect the clarity or usability of your photograph.
Understanding these requirements as a complete system rather than individual rules helps explain why certain restrictions exist. For example, the neutral expression requirement isn’t arbitrary – it ensures that your face appears consistent with how you’ll look during routine activities, making identification easier for border security personnel.
The technical specifications for digital passport photos include specific pixel dimensions, color depth requirements, and file size limitations. Photos must be taken with sufficient resolution to maintain clarity when printed at the required 2×2 inch size, and the digital file must be properly compressed without introducing artifacts that could affect image quality.
Recent updates to passport photo requirements have addressed new technologies and security concerns. These changes reflect improvements in facial recognition software and evolving security protocols that help protect against document fraud and identity theft.
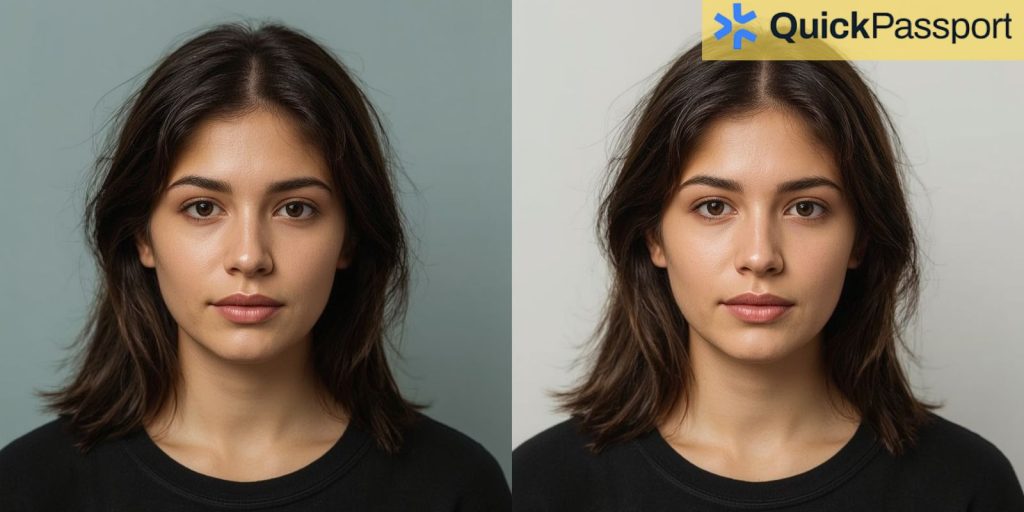
Critical Background and Lighting Mistakes
Background errors represent one of the most frequent reasons for passport photo rejection, yet they’re among the easiest mistakes to prevent with proper preparation. The required plain white or off-white background must be completely uniform without any shadows, patterns, textures, or color variations that could interfere with the photo’s acceptability.
Many applicants underestimate how sensitive the review process is to background imperfections. Even subtle shadows cast by improper lighting can cause rejection, as can barely visible patterns or textures in what appears to be a solid background. The background must extend beyond the edges of the photo frame and maintain consistent color and brightness throughout the entire image area.
Lighting mistakes often compound background problems by creating uneven illumination that produces shadows or color variations. Proper lighting requires multiple light sources or diffused natural light that illuminates your face evenly without creating harsh shadows under your nose, chin, or around your eyes. Direct flash photography typically creates the harsh shadows and red-eye effects that lead to rejection.
Professional lighting setups use multiple light sources positioned at specific angles to eliminate shadows while providing even illumination across the subject’s face and the background. This setup prevents the background from appearing gray or uneven due to insufficient lighting, and it ensures that facial features remain clearly visible without harsh contrast.
Color temperature consistency is another critical factor that many amateur photographers overlook. Mixed lighting sources with different color temperatures can create color casts that make the background appear off-white or tinted, leading to rejection even when the background material itself is perfectly white.
Indoor photography presents particular challenges because household lighting rarely provides the even, shadow-free illumination required for acceptable passport photos. Window light can work well when properly diffused, but direct sunlight through windows often creates the same harsh shadows and uneven lighting that cause problems with artificial lighting.
Facial Expression and Head Positioning Errors
Facial expression mistakes rank among the most common reasons for passport photo rejection, primarily because applicants often misunderstand what constitutes an acceptable neutral expression. The required expression is not simply “no smiling” but rather a completely relaxed, natural face with the mouth closed and no visible emotion or tension.
Many people struggle with achieving a truly neutral expression because they feel awkward or self-conscious during photography. This discomfort often results in subtle facial tension that creates an unnatural appearance, even when the person isn’t actively smiling or frowning. The key is to relax all facial muscles and look directly at the camera with a calm, natural expression.
Head positioning errors frequently occur when applicants tilt their head slightly to one side, turn at an angle, or position themselves too high or low relative to the camera. Your head must be perfectly straight and centered in the frame, with your eyes looking directly at the camera lens rather than slightly off to one side.
The proportion of your head within the frame follows specific measurements that many people get wrong when taking their own photos. Your head should measure between 1 inch and 1 3/8 inches from the bottom of your chin to the top of your head, occupying 50-69% of the image’s total height. This precise measurement ensures consistency across all passport photos.
Eye positioning represents another critical factor that affects photo acceptability. Both eyes must be clearly visible and open, looking directly at the camera. People with long bangs or hair that partially covers one eye often receive rejections, as do photos where the person is looking slightly away from the camera or has one eye partially closed.
Neck and shoulder positioning also affects the overall composition of your passport photo. Your shoulders should be square to the camera and level, not tilted or turned at an angle. This positioning helps ensure that your head appears properly centered and that the overall composition meets the required standards for passport documentation.
Clothing and Appearance Violations
Clothing choices significantly impact passport photo acceptability, yet many applicants overlook these requirements until their photos are rejected. The fundamental rule requires everyday clothing that contrasts sufficiently with the white background to create clear definition between your body and the backdrop.
White and very light-colored clothing creates the most problems because it blends with the required white background, making it difficult to distinguish where your body ends and the background begins. This blending effect can cause your head to appear disconnected or floating, which violates the composition requirements for passport photos.
Uniform restrictions apply to military uniforms, airline pilot uniforms, and other official clothing that might suggest government affiliation or professional authority. These restrictions exist to prevent confusion about your civilian status and to maintain consistency in passport documentation across all applicants.
Casual clothing works best for passport photos, but it should be neat, clean, and professional in appearance. T-shirts, collared shirts, blouses, and sweaters in solid colors typically work well, provided they contrast appropriately with the white background. Avoid busy patterns, logos, or text that might distract from your face or create visual confusion.
Jewelry and accessories require careful consideration because they can create reflections, shadows, or visual distractions that affect photo quality. Large earrings, multiple necklaces, or shiny accessories might cause problems, while simple, conservative jewelry typically doesn’t interfere with photo acceptability.
Hair styling should frame your face naturally without covering your eyes, eyebrows, or other facial features. Extreme hairstyles, unusual colors, or elaborate styling might not reflect your everyday appearance, which could create identification difficulties when you present your passport for travel.
Technical Photo Quality Issues
Digital photo quality problems often stem from inadequate camera equipment, improper settings, or post-processing mistakes that degrade image clarity and color accuracy. Passport photos must meet specific technical standards for resolution, sharpness, and color reproduction that ensure they reproduce properly when printed in your passport document.
Resolution requirements specify minimum pixel dimensions that maintain image quality when printed at the required 2×2 inch size. Photos taken with older smartphones or low-resolution cameras may appear acceptable on screen but lack sufficient detail for proper printing and reproduction in official documents.
Focus and sharpness issues frequently occur when photographers use autofocus systems incorrectly or when camera shake affects image clarity. Your entire face must be in sharp focus, with clear definition of facial features, hair texture, and other identifying characteristics that border security personnel rely on for identification verification.
Color accuracy becomes critical when photos are printed and integrated into passport documents. Incorrect white balance, color saturation, or exposure settings can create color casts that make your skin tone appear unnatural or that affect the background’s appearance. These color problems often become more apparent during the printing process than they appear on digital screens.
Compression artifacts from excessive file compression can create visible distortions, particularly around high-contrast areas like the edges of your face against the white background. While digital files must meet size limitations, over-compression that introduces visible artifacts will result in photo rejection.
Digital retouching and filtering represent serious violations of passport photo requirements. Any alteration of your natural appearance, including smoothing skin texture, whitening teeth, or adjusting facial features, can result in rejection and may raise concerns about document fraud. Photos must represent your natural, unaltered appearance as you would appear in person.
How QuickPassport – Phoenix Ensures Photo Compliance
QuickPassport – Phoenix specializes in providing professional passport photo services that eliminate the guesswork and potential mistakes associated with DIY passport photography. Their experienced staff understands the current requirements thoroughly and maintains professional equipment specifically designed for passport photo compliance.
The professional photography setup at QuickPassport – Phoenix includes calibrated lighting systems that provide even, shadow-free illumination across both the subject and background. This lighting configuration eliminates the harsh shadows and uneven exposure that commonly cause amateur photos to be rejected during the application review process.
Their quality control process includes immediate review of each photo to verify compliance with all current requirements before you leave their location. This real-time verification means you can address any potential issues immediately rather than discovering problems weeks later when your application is reviewed by government officials.
QuickPassport – Phoenix stays current with any changes to passport photo requirements and updates their procedures accordingly. Government specifications occasionally change, and professional services monitor these updates to ensure continued compliance, while individual applicants might miss important requirement changes.
The convenience factor of professional services extends beyond just photo quality to include proper printing on appropriate photo paper with correct dimensions and color reproduction. QuickPassport – Phoenix handles all technical aspects of photo preparation, ensuring that your photos meet both digital and physical requirements for passport applications.
Their expertise proves particularly valuable for applicants with special circumstances, such as those who wear glasses for medical reasons, have religious head coverings, or need to meet specific requirements for expedited passport processing. Professional guidance helps navigate these special situations while maintaining full compliance with government standards.
Frequently Asked Questions
Can I wear glasses in my passport photo?
Generally, you should not wear glasses in passport photos unless they are required for medical reasons. If you must wear glasses, ensure there’s no glare on the lenses, your eyes are clearly visible, and the frames don’t cast shadows on your face.
What happens if my passport photo is rejected?
If your photo is rejected, your entire application will be returned, and you’ll need to resubmit with compliant photos. This delays processing and may require paying application fees again, depending on your specific situation.
Can I take my own passport photo at home?
While it’s possible to take your own passport photo, it’s challenging to meet all requirements without professional equipment. Many DIY photos are rejected due to lighting, background, or positioning issues that are difficult to control in home settings.
How recent must my passport photo be?
Passport photos must be taken within six months of your application submission. The photo should represent your current appearance accurately, reflecting any significant changes in your looks since previous documentation.
Are there different requirements for children’s passport photos?
Children’s passport photos follow the same basic requirements as adult photos, but infants under one year old don’t need to have their eyes open, and slight variations in head positioning may be acceptable for very young children.
Can I wear makeup in my passport photo?
You can wear makeup as long as it represents your normal, everyday appearance. Avoid dramatic makeup that significantly alters your appearance, as this could create identification difficulties when traveling.
What if I have a medical condition that affects my appearance?
If you have a medical condition that affects your ability to meet standard photo requirements, you may need to provide medical documentation explaining the condition. Contact the passport office for guidance on specific medical situations.
How long does it take to get new photos if mine are rejected?
Getting new photos can typically be done the same day at professional services like QuickPassport – Phoenix. However, resubmitting your application and waiting for processing will add weeks to your overall timeline.
Conclusion
Avoiding common passport photo mistakes requires attention to detail and understanding of specific government requirements that govern acceptable passport photography. The most frequent errors involve background and lighting issues, improper facial expressions, incorrect head positioning, inappropriate clothing choices, and technical quality problems that can all result in application rejection and significant delays.
The consequences of passport photo mistakes extend far beyond simple inconvenience, potentially affecting travel plans, business opportunities, and important personal events. Understanding these requirements before beginning the photo process helps ensure your application receives approval on the first submission, saving time, money, and frustration.
Professional services like QuickPassport – Phoenix offer valuable expertise and equipment that eliminate much of the guesswork associated with passport photo compliance. Their experience with current requirements and quality control processes provide peace of mind that your photos will meet all necessary standards for government approval.
Whether you choose professional services or attempt to take your own photos, following the passport photo tips outlined in this guide will significantly improve your chances of success. Remember that passport photos serve important security and identification purposes, making compliance with all requirements essential for both application approval and effective document functionality during travel.